Project Set-up
These ones are the actions related to the set up of a project. Use this guidelines as a checklist when needed. Inputs: Signed Proposal, Project Charter, Pass the Baton Meeting Notes.
1. Frank Set Up
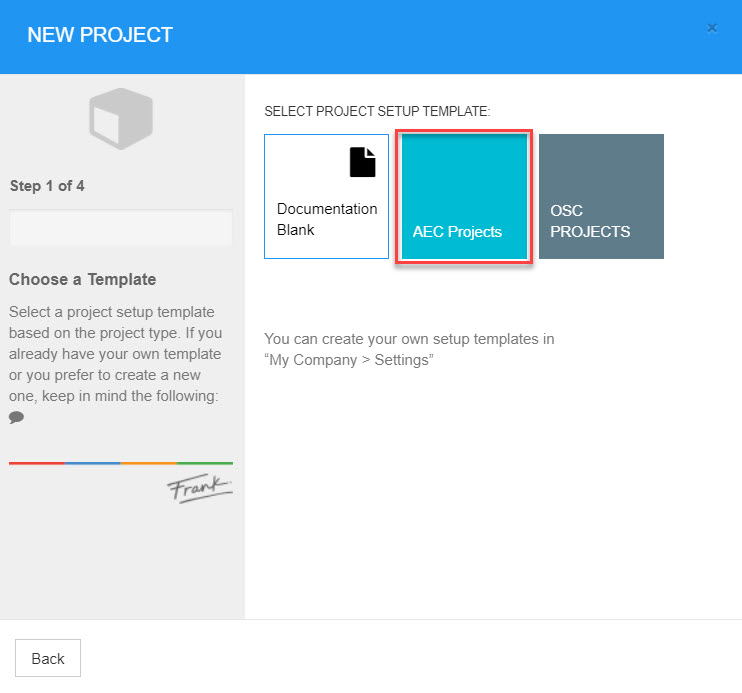
1.1 Creating the ProjectProject templates in Frank are used for creating projects with a consistent set of elements according to their type. They include: Standard Tasks, Deliverables, Workflow and Expenses.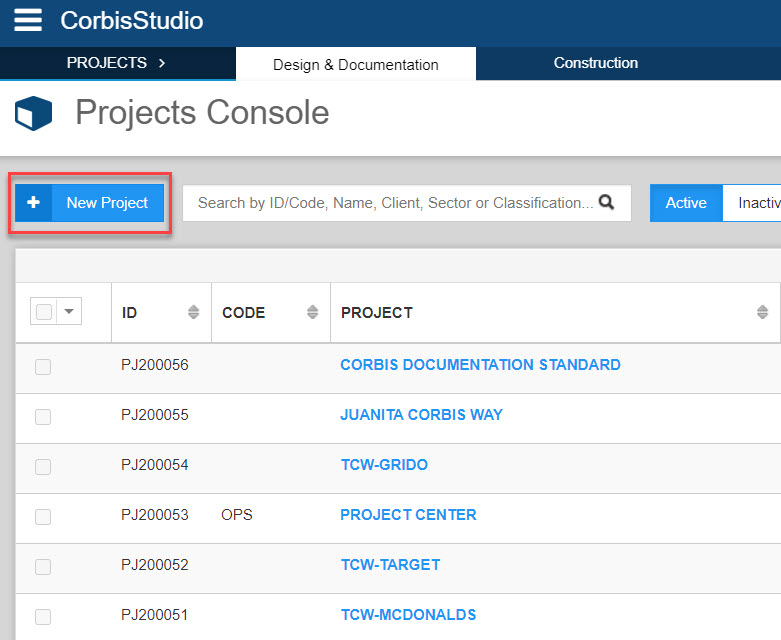
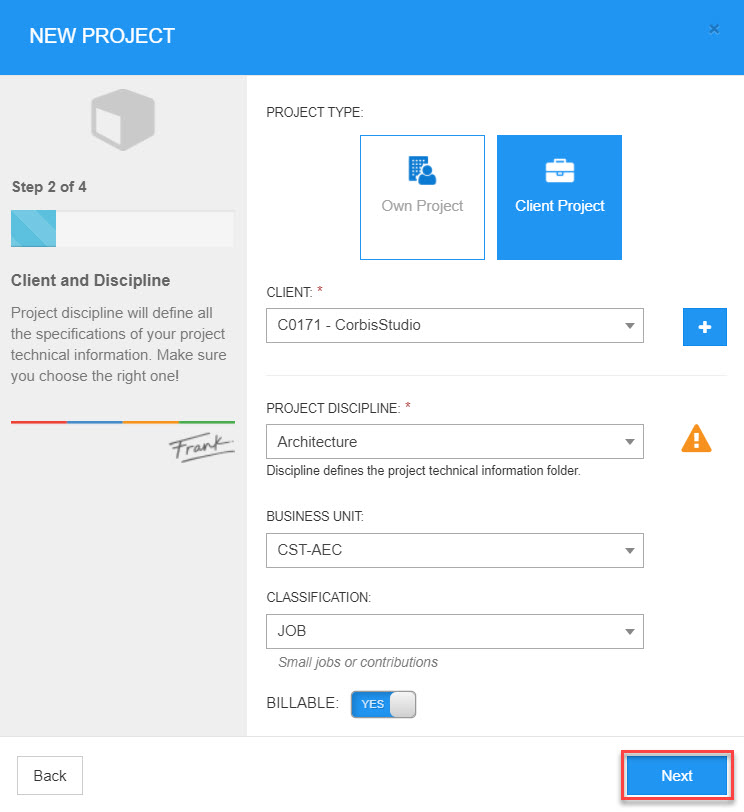
• Select the Client, Discipline and Business Unit. • The project classification should be selected according to the type of project and discussed at the Take Off meeting (this cannot be changed later).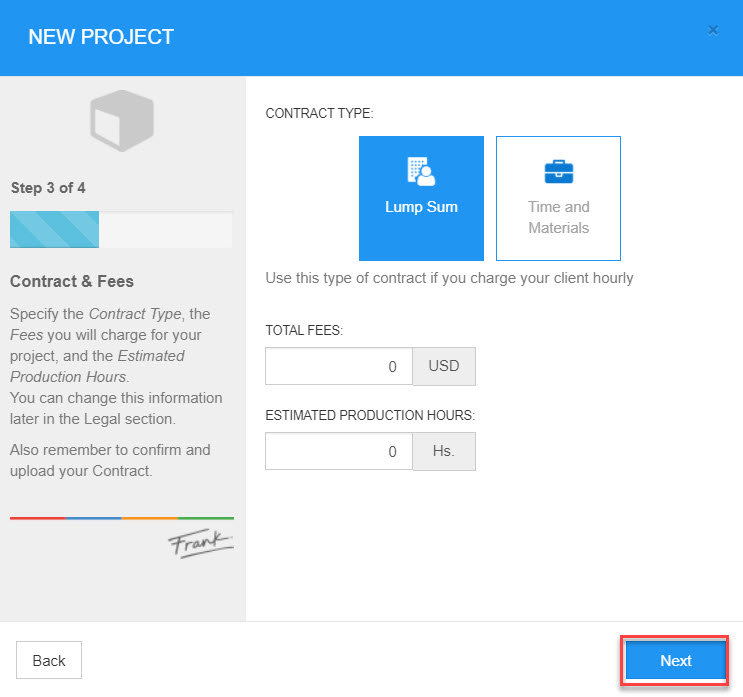
• Add the basic contract Information. Currently this information does not get saved and needs to be re-done.
• Add the Name and dates. These can be changed afterwards if needed.1.2 Adding the Contract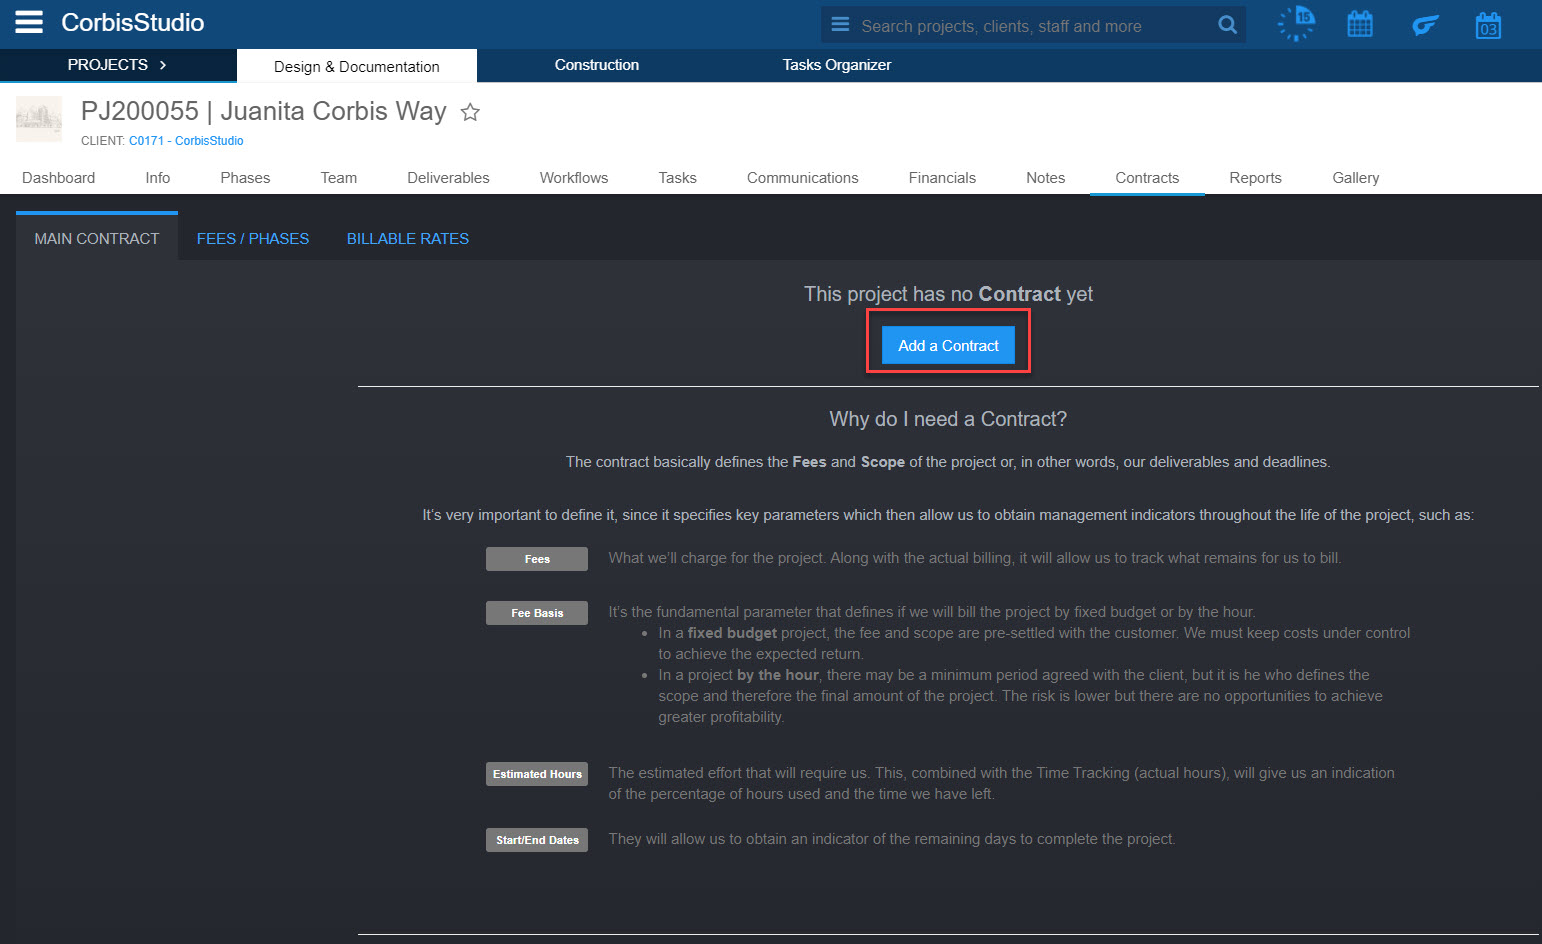
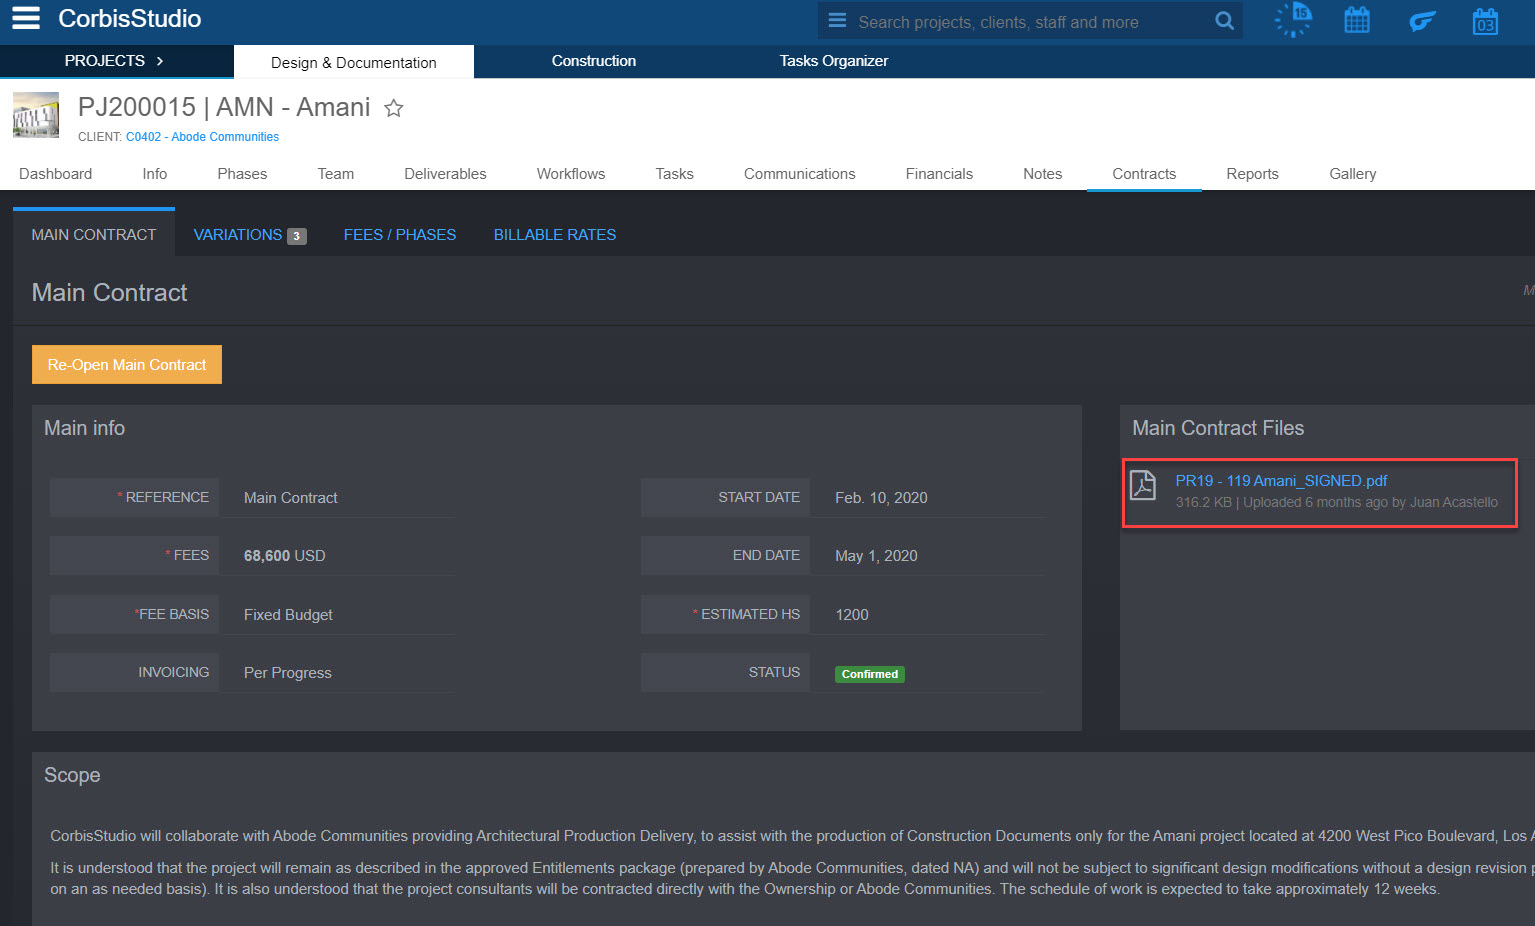
• Complete the Main info section with the information from the proposal and typical contract conditions according to the type of contract. Estimated Hours should come from the resource plan. • Download the signed pdf of the proposal from Pandadoc and upload it in Main Contract Files. • Transcript the scope in the proposal and/or kick off. Include any relevant information or notes that cannot be understood from the Main info, i.e. If there are Scope subdivisions, rates, or unit prices for portions of the scope.1.3 WorkflowWorkflows get automatically applied to the project as they are part of the project template you choose when creating the project. It is used for storing the key project documents.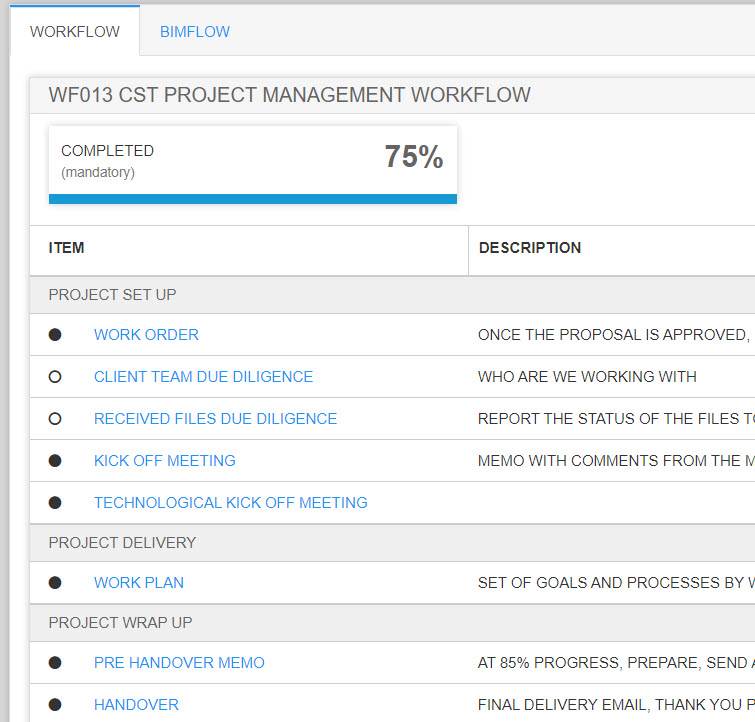
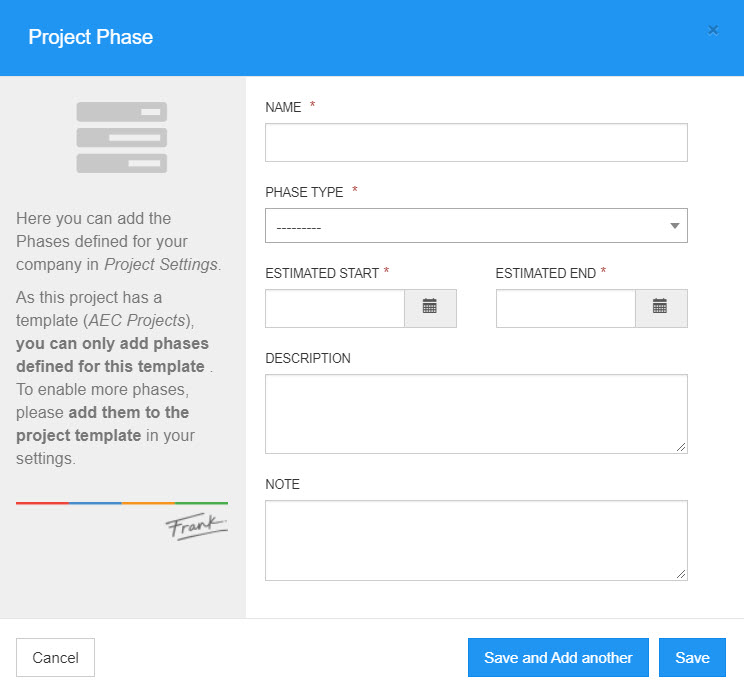
1.4 Setting up Phases• Step 1: Create the project Phase in the Phases tab: Phase Name (goal is to keep the phase naming consistent across projects). Phase Type comes from a master list.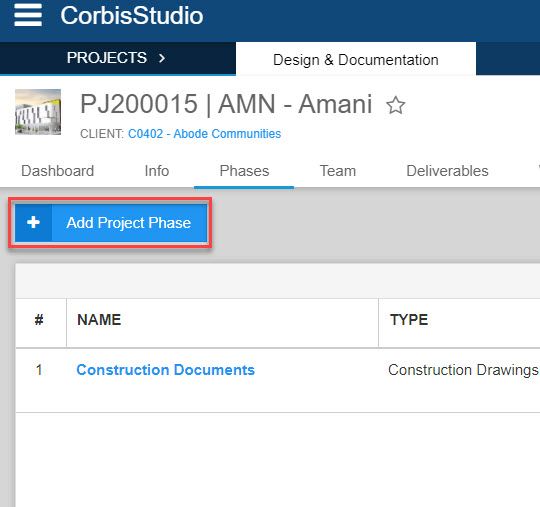
Step 2: Add the Financial Information to the Phase Contracts tab. Fees for each phase should be per the proposal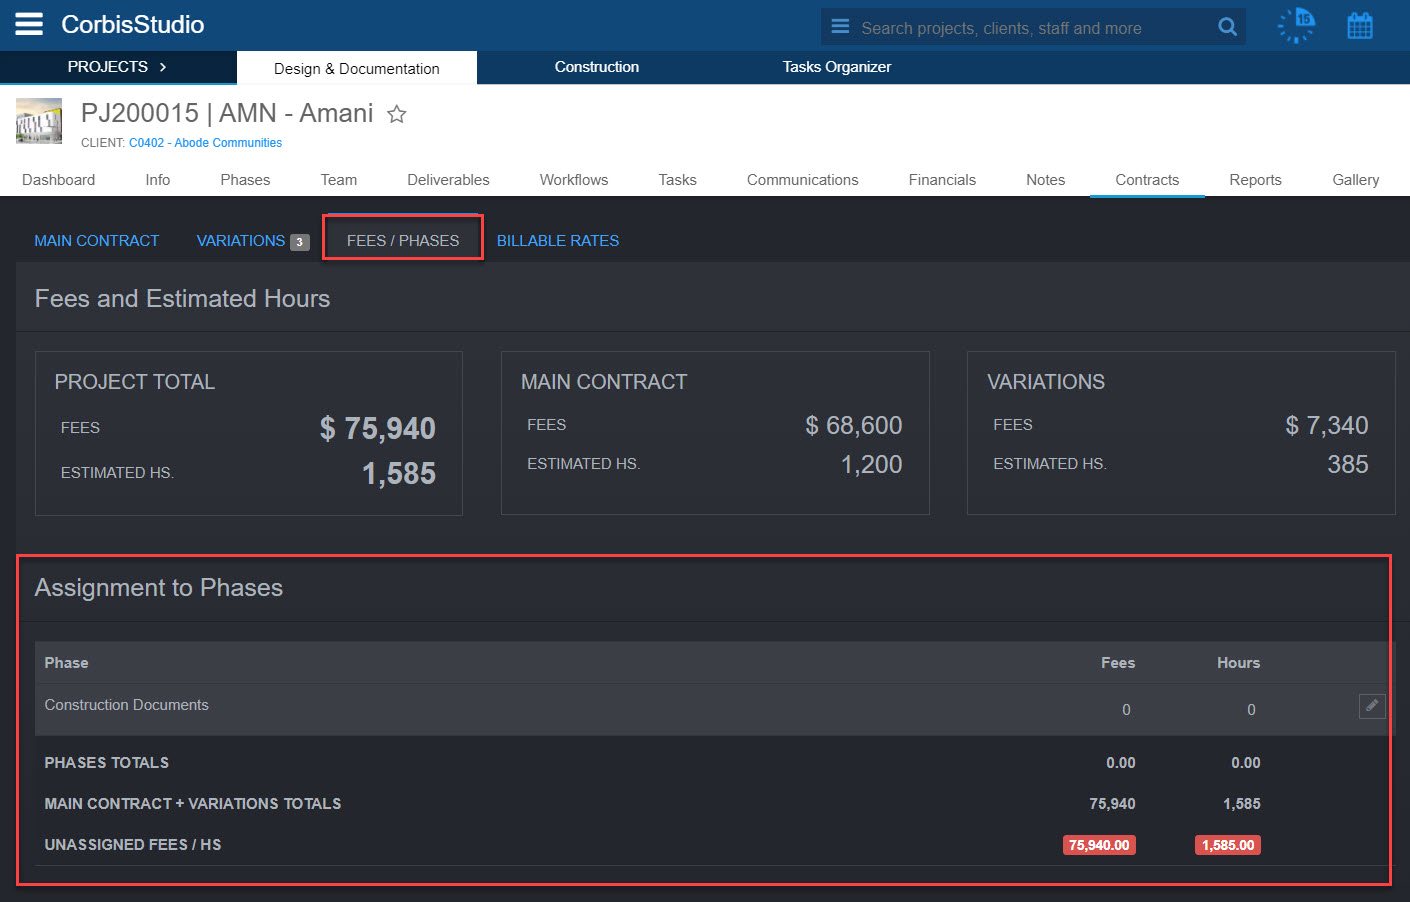
1.5 Assigning Project Budget• Estimate the available budget based on the Fees and expected results: • Budget = Fees / Target NM (defined at TOM) • Break down your budget based on the contract conditions. Split in Phases, Scopes, identify special expenses, etc • Transfer the budget to frank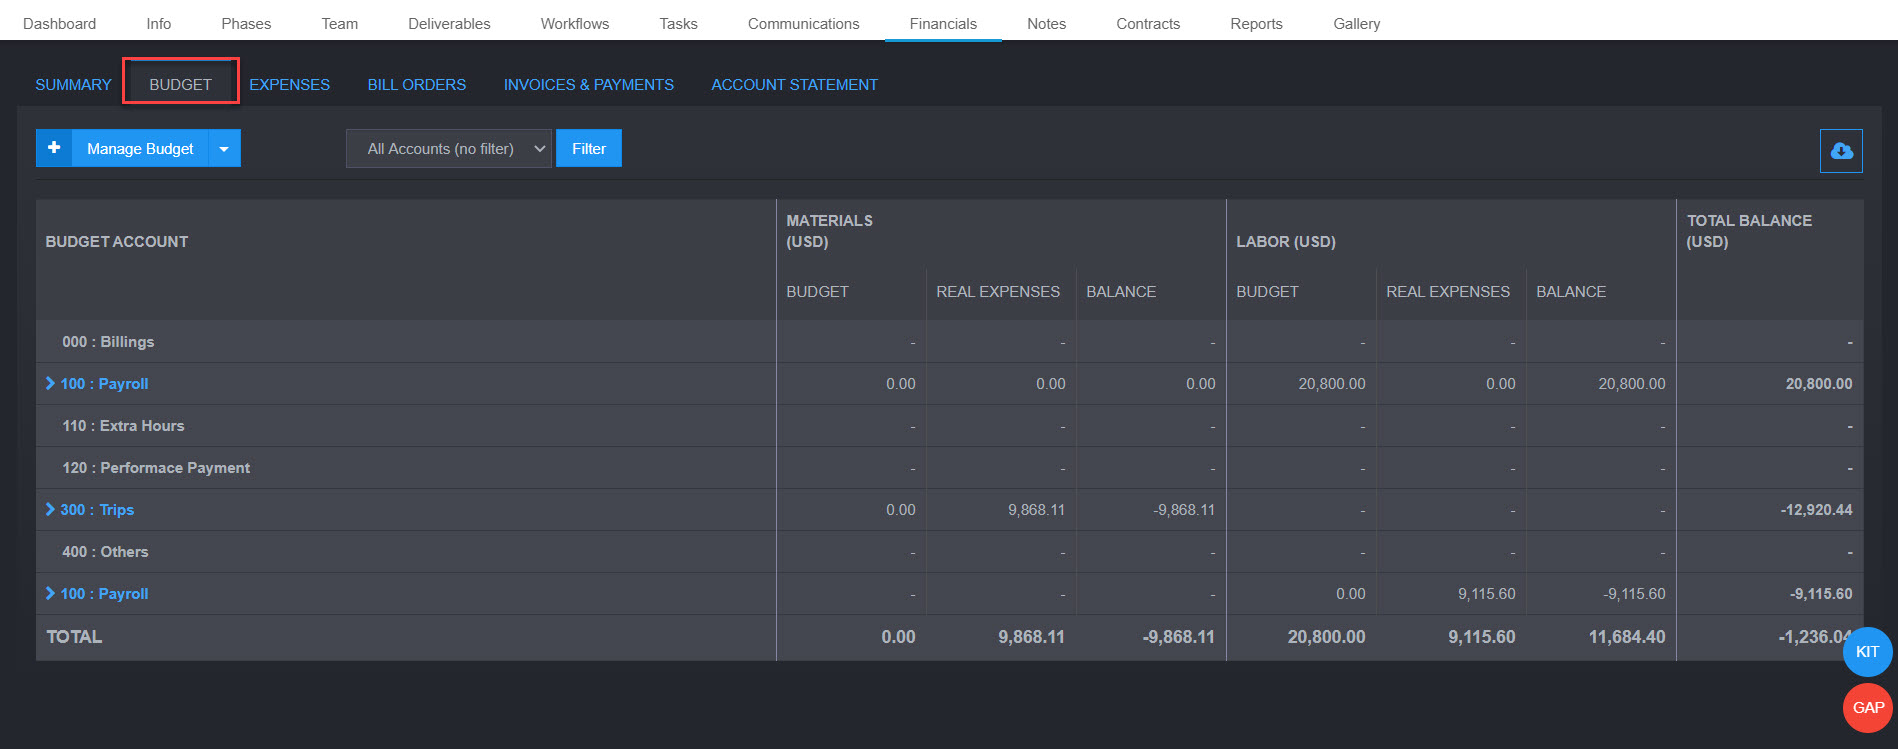
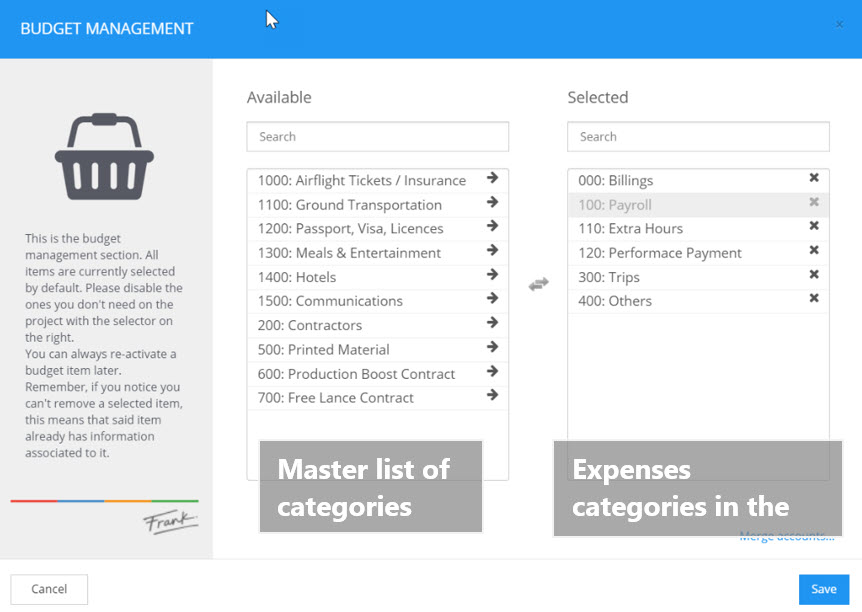
• Categories are predefined from a master list and applied by project template when the project is created. Other categories can be added from the Manage budget button. • Usually all or most of the project cost is Payroll. Edit the category to add the allocated amount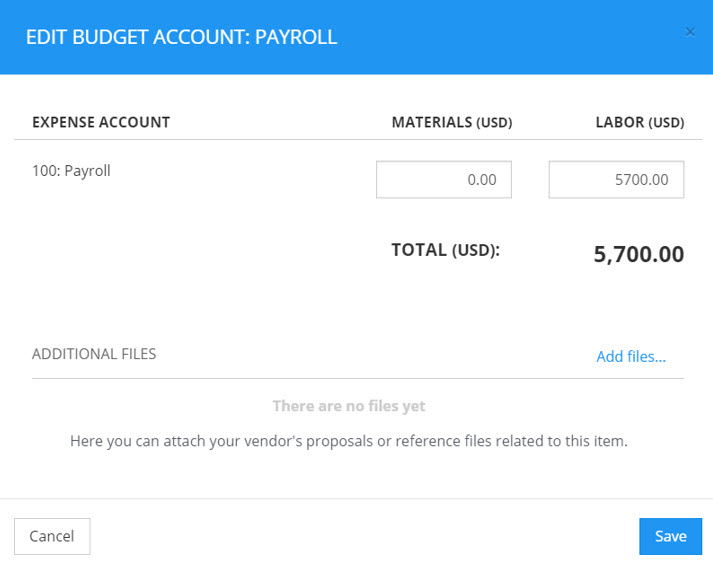
• Depending on the expense category you can identify material and labor cost.1.6 Assigning the Team• Matching Schedule and Plan with Budget • Anticipating Staff needs • If there is one, review the resource plan in the Proposal Fee Calculator • You can split your fee by $42 (average blended rate) to get a quick reference on the total available hours • If needed, create a detailed plan per week with the different staff required to meet the plan • Transfer this information into the OPS Forecast1.7 Task and Time Tracking Standards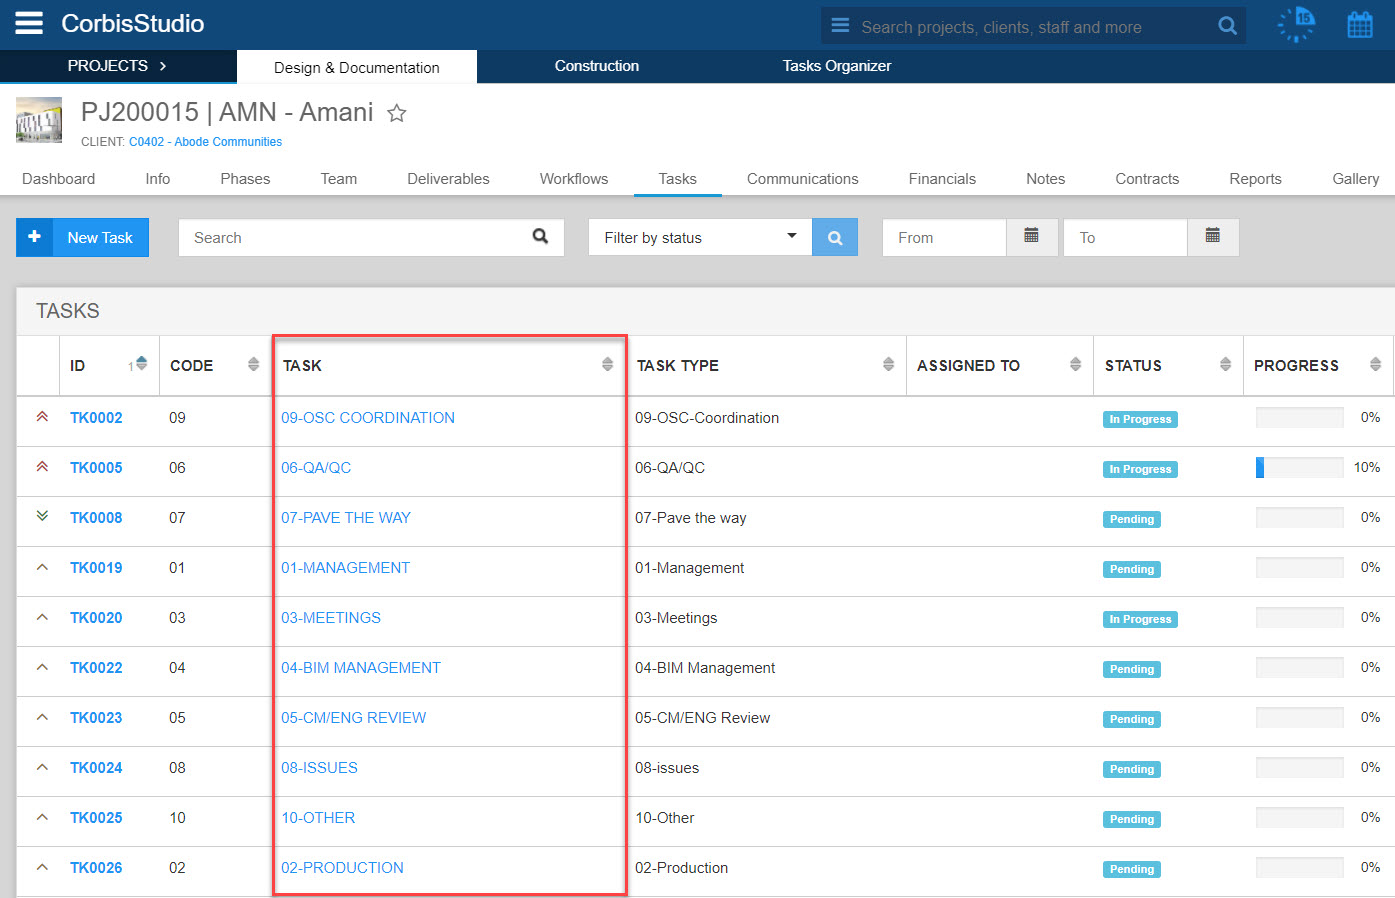
• We will use the predefined list of tasks applied by template to keep the Tim tracking consistent. • Defining typical notes for the team to identify the different activities that take place as part of a typical task i.e. “families creation” within the 02-Production task |
2. Folder set Up
2.1 C: Drive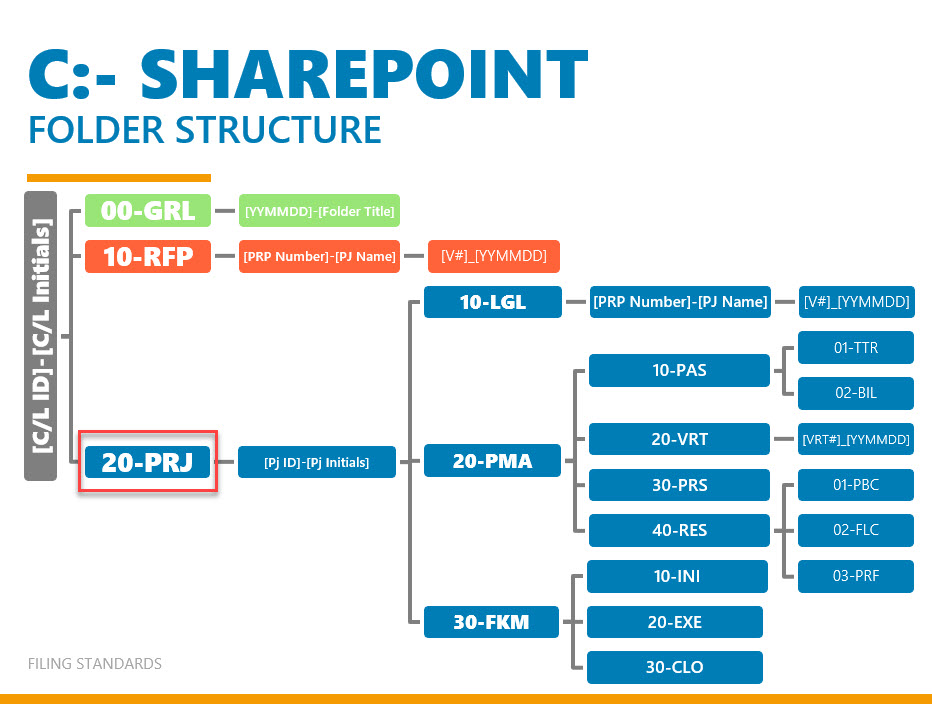
• Setting up the management files in the C – Clients & Leads Drive (Sharepoint) • Check if the client folder exists. If it’s a new client, create the Client folder by copying the standard folder structure, and rename using the Client Code from Frank. • Create the project folder inside the 20-PRJ folder within the Client folder (use the PJ code from frank) • Save the signed proposal pdf on the LGL folder.2.2 X: Drive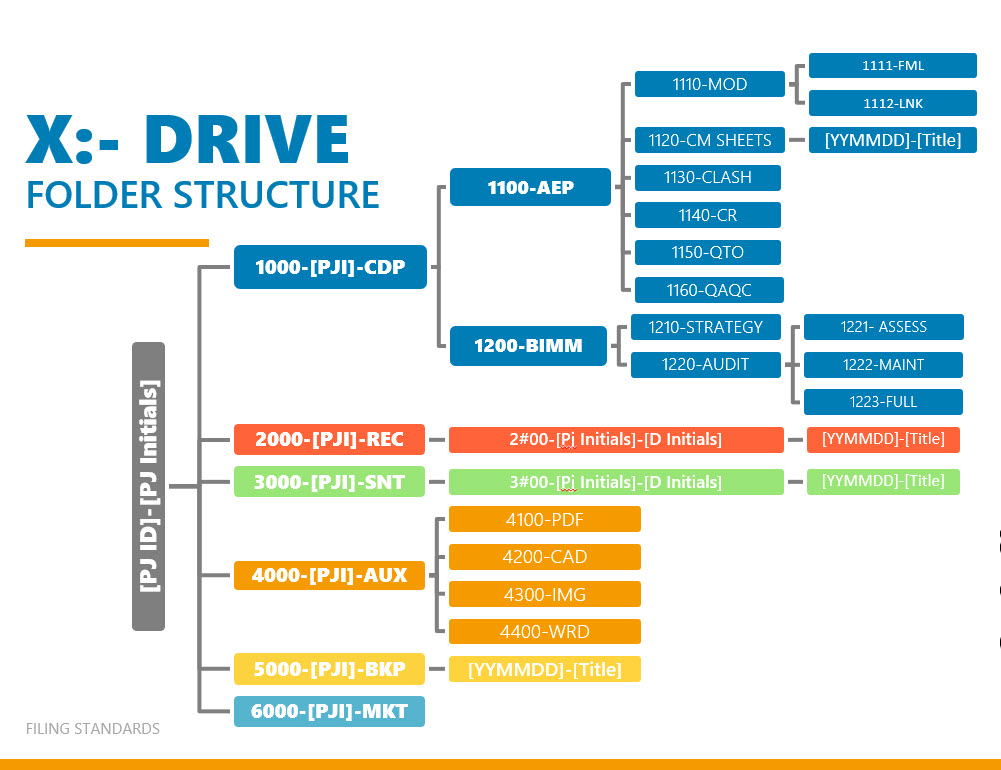
• On the X Drive • Create the client Folder using the client code from frank • Creating the project folder on the X Drive using Folder Maker.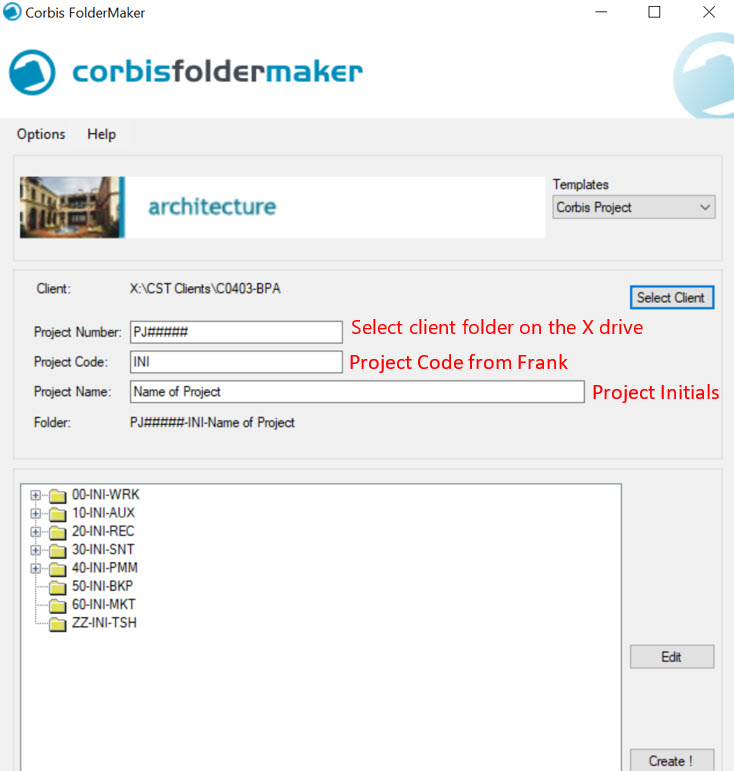
• Transferring any technical Information received during the proposal phase to the REC folder for the team to have access. |